Simplify Statements
in Office Therapy
Office Therapy statements can range from simple to complex,
depending on your client’s needs and your preferences.
Under the Bill Setup tab in Client setup, you can choose
from 3 Format options: Basic, Your Portion, or e-Statements. The latter is used
to send statements to the Trizetto clearinghouse for mailing or posting
on-line. This option allows for a greater degree of customization.
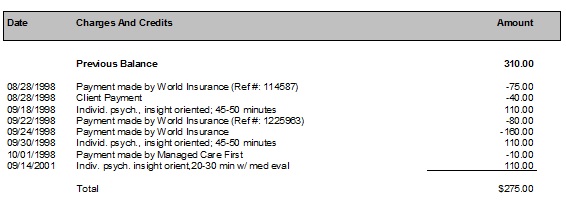
The Basic Bill Format
shows transactions for a selected period and the amounts, including Insurance
and Patient portions.
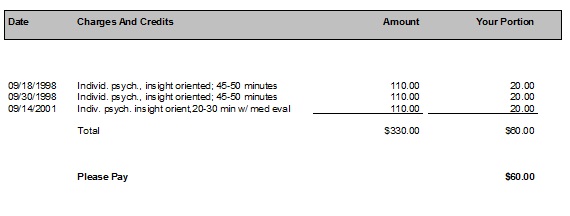
The Your Portion Bill
Format shows transactions for a selected period, with a column for the total and one for the
patient portion.
This format is often easier for patients to follow.
They can see the total charged and what they owe for each service with the
total at the bottom.
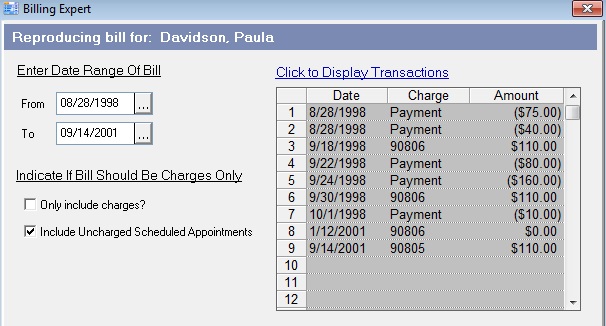
In the example below, only charges are shown; no payments
are on the statement.
If you want payments to be displayed, you can select that
when running bills. Below is an example of adding payments to the statement.
Other options on
statements include:
Under Client setup – Bill Setup
·
Print client name – Prints the client’s name in
the top left part of the Statement
·
Print diagnosis
– Prints the client’s diagnosis code(s) (e.g. F34.1) in the top left part
of the Statement
·
Print first visit date – Prints the client’s 1st
visit in the top left part of the Statement
·
Print provider information – Prints the
rendering provider name in the top left part of the Statement
·
Print Procedure code – Prints the procedure code
for the charge. For example:
Date Procedure Charges and Credits Amount Your Portion
09/09/2016 90834 Individual
therapy 45 minute $100 $20.00
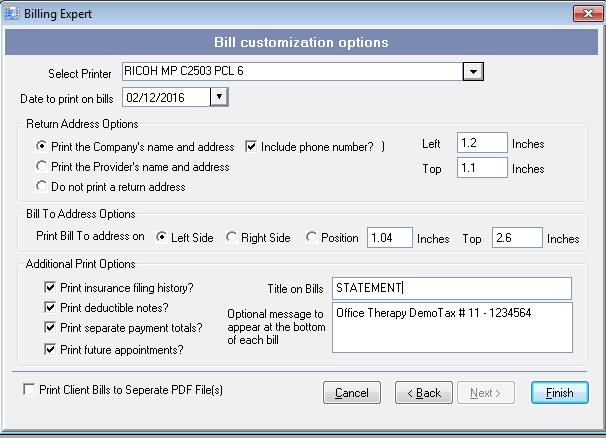
Option when generating the Statements Using the Billing
Wizard
These options can be set when generating a statement. They
are saved so that the next time you generate statements, the same settings are
used.
- Only include charges – check this to show
charges only and not show payments
- Include Uncharged Scheduled Appointments – by
checking this option, appointments not charged are listed on the statement
·
Overdue messages – you can print an overdue
message based on the number of months without payment, print aging information
(e.g. 30/60/90 days), or omit an overdue message
·
Print your company name and address with or
without phone number - shows at the top
of the statement
·
Print your Provider’s name and address -
shows at the top of the statement. Also see Provider setup to select
data to print to Statements (Tax ID, License, NPI)
·
Do not print company nor provider name or
address
·
Print insurance filing history – this will
display along with the charge line, when the charge was filed to insurance
(e.g. Individual Therapy 45 minutes(filed to Blue Cross on 2/12/2015))
·
Print deductible notes – when entering a payment
and using the Apply to Deductible to reallocate the amount to the patient, this
option shows the details of that reallocation on the statement.
In the example below, the insurance
company did not pay the entire amount because there was a deductible. So, of
the total amount of $100, the insurance paid $50 and you shift the other $50 to
the patient for the deductible.
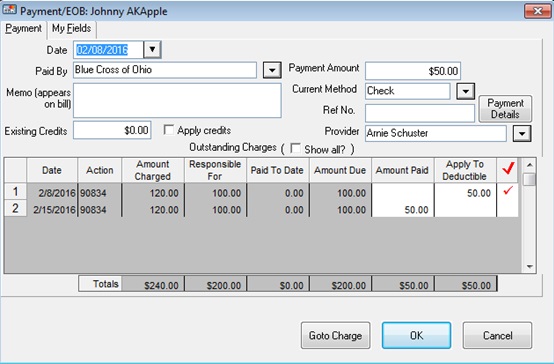
The Statement will reflect that the
deductible was applied to the patient.

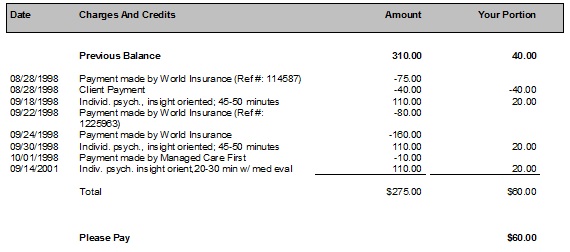
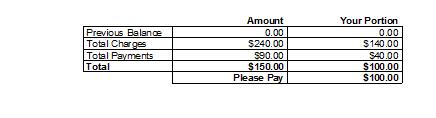
- Print separate payment totals – As opposed to a
simple display of what the patient owes, this option will show a breakdown of
any previous balance, total charges, total payments, a total, and a Please Pay
line.
- Print future appointments
- Enter Title to appear on Statements (default is
Statement, but you can use this to change the title)
- Optional message appearing at bottom of
Statement – you can enter a message which displays at the bottom
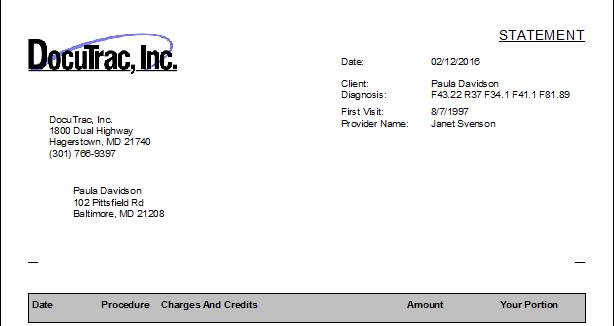
Adding you logo to
the top of statements
To add your logo, go to File…Administration…Maintain Company
Information.
Enter company information. To the left of the company data,
click Browse. Navigate to the location of your logo. It can be in BMP or JPG
format, and should be no larger than about 500 by 300 pixels. You can scale the
image by stretching, or zooming, or using the normal size. Click the Preview
Button to see how it looks for each setting. When satisfied, click OK to save.
The example below shows the logo with the company
information and other options from the billing wizard.